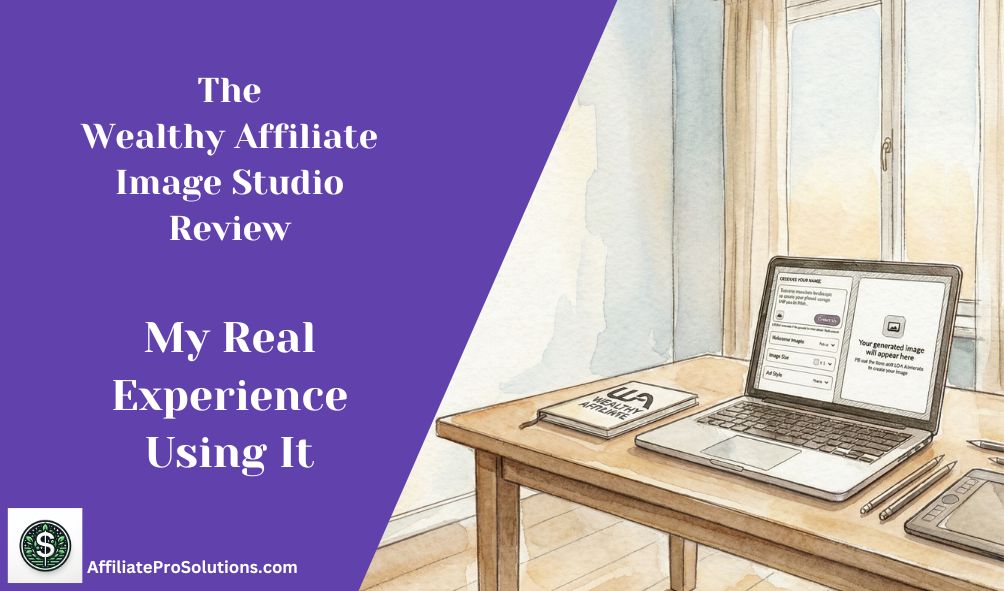
Topic – Wealthy Affiliate
Post Reading Time – 34 Minutes
If you’ve ever spent far too long searching for an image, downloading it, editing it, then trying to make it fit into your blog and social posts, then this Wealthy Affiliate Image Studio Review might just help you out.
I’ve been through that routine more times than I care to remember. It was so annoying. Checking stock photo sites, finding out you’re not allowed to use them, using editors that are difficult to work with, and the frustration of resizing the same image again and again.
That’s exactly why I was happy when Wealthy Affiliate added their Image Studio. It gives me an easier way to create my visuals without leaving the platform, and after using it myself, I wanted to share with you how it actually works.
In this review, I’ll go through what the Wealthy Affiliate Image Studio does, how I use it, the types of images you can create, and a few tips I’ve picked up along the way. And by the end, you should have a good idea of whether this feature will suit the way you like to work.
This is a detailed hands on review based on the use of the platform, so please feel free to jump to the sections most relevant to you using the table of contents.
Summarize This Content Using AI
TL;DR
Wealthy Affiliate Image Studio review
This review looks at what the Wealthy Affiliate Image Studio offers, how it works, and what you can expect if you use it for your website’s images. It explains the main features, where it’s strong, and where it may not be the best option, so you get a good idea before you decide. That way you know what it does and how it might help your image workflow.
A Quick Summary Of The Wealthy Affiliate Image Studio
To start off with, here is a short summary of the main details of the Wealthy Affiliate Image Studio.
- Product name– Wealthy Affiliate Image Studio
- Platform – Wealthy Affiliate
- What it is – An AI powered image creation feature built directly into the Wealthy Affiliate platform
- Main purpose – Creating original images for blog posts, social content, and website visuals using text prompts
- Who it’s for – Bloggers, affiliate marketers, and website owners who publish content regularly
- Where it’s used – Inside the Wealthy Affiliate platform, alongside the writing and publishing tools
- Image types – Blog headers, in-post images, social visuals, Pinterest images, banners, thumbnails, and basic mockups
- Skill level – Beginner friendly, no design or image editing experience needed
- Credits system – Uses Wealthy Affiliate AI credits, shared with other AI tools such as content creation and keyword research
- Cost – Included with Wealthy Affiliate memberships, no separate image tool subscription required
If you want it all in simple terms, the Wealthy Affiliate Image Studio helps you create original images while you’re working on your content, without needing to go to stock photo sites or other separate design tools.

What Is The Wealthy Affiliate Image Studio?
The Wealthy Affiliate Image Studio feature is an image creation tool built directly into Wealthy Affiliate. You do not need to install any extra software, create new accounts, or pay for another monthly tool. Everything is already there inside the platform for you.
So, instead of searching through stock photo sites, you can now simply describe the image you want in plain text. The system then creates the image for you, and this is done usually within a few seconds. That alone removes a big chunk of the time you used to lose when working on visuals.
The tool is aimed at people like bloggers, affiliate marketers, freelancers, and anyone wanting to create content on a regular basis. You can generate an image, make any small changes if needed, and then add it straight into a blog post or page without going between different tools.
From my own use, a few things stand out.
- Everything happens in one place inside Wealthy Affiliate, which means less tab switching and fewer distractions.
- Images are created from simple text prompts, so the visuals match the topic I am working on instead of feeling fake or generic.
- It works well for lots of different tasks, such as blog images, email visuals, banners, or simple mockups, without having to start over each time.
As a feature, the Wealthy Affiliate Image Studio feels easy rather than complicated. It is there to get the job done and let you move on with publishing, instead of slowing you down with extra steps.
Solving Common Problems With Images
Images have always been one of the most time-consuming parts of putting a post together for me.
I remember searching through stock photo sites, seeing the same images used again and again, and then going back and forth between editors just to resize or change things. This quickly becomes tiring in my opinion and I didn’t enjoy it.
Add the unexpected costs for better quality images or tools, and it started to feel like more work than it needed to be.
This is where the Wealthy Affiliate Image Studio has helped simplify things for me.
Instead of me now visiting different websites and tools, everything happens in one place. I no longer spend time downloading files, renaming them, uploading them again, or trying to remember where I saved something.
There are a few specific issues it helped me deal with.
- I spend a lot less time looking for images because I can create what I need straight away.
- The visuals feel more personal to my content instead of looking like generic stock photos.
- There are no extra charges for separate image or editing tools, as Image Studio uses the AI credits that are included with your Wealthy Affiliate membership.
- I do not need to move between different platforms just to get one image ready.
- Resizing is easier because I can choose the format before creating the image.
I used to keep folders full of stock images with random file names, many of which I later noticed on other people’s sites as well.
Now I just describe what I need, add a bit of detail if I need to, and the image fits the content much better. It has taken a lot of unnecessary work out of the process.

Who Will Get The Most Out Of The Wealthy Affiliate Image Studio?
From using the Wealthy Affiliate Image Studio myself, I can see it being useful for quite a wide range of people, but I think some will get more value from it than others.
If you run a blog or a niche site and publish content regularly, having custom images makes things a lot easier and it takes a lot less time. I have found that adding a header image or an image inside the post that actually fits the topic feels far better than just adding in a random stock photo.
It just looks more natural than using the same stock images you see everywhere else.
Who This Tool Makes Life Easier For
Affiliate marketers will also get a lot out of it.
Being able to create mockups, simple promo images, or visuals that match an offer without visiting different tools saves time. I like the fact that I can adjust things quickly if I change a message or update a page, without starting all over again.
For freelancers or anyone doing client work, speed is also important. When you need to get a job out quickly, having image creation and editing in the same place cuts down on any extra steps. That usually means less time spent on searching and more time actually getting the work finished.
Beginners who have never touched design software before will probably find this feature a lot less intimidating than the more traditional tools. You do not need to understand design terms or learn complicated menus. Describing what you want in plain language is enough to get a good result.
Even if you already feel comfortable using other available image tools, the Wealthy Affiliate Image Studio is still a good choice if you want to get things done fast.
Downloading files, resizing them, and switching between tabs adds extra steps that you do not really need. This studio cuts a lot of that out and keeps things moving.
How To Create Images With Image Studio
Using the Image Studio follows a very simple process, which is one of the things I like most about it.
I just describe what I want, choose the format I need, and let the tool create the image. Once it’s done, I can keep it as it is, make a few changes, or generate another version without leaving the tool.
When I start, I usually type a short description of the image I have in mind. This can include what the image is about, the mood, the style, or how I plan to use it. I do not need to be technical or clever with the wording.
Plain language works just fine and still gives you good results.
Before generating the image, I choose the format I need. Wide images work well for blog headers and thumbnails, square images are useful for social posts, and vertical images are better for platforms like Pinterest.
Choosing the format first saves time later because the image already fits where I plan to use it.
The images I ask for usually appear within a few seconds. If the first result is not quite right, I can generate another version or make a small change to the description. I often do this a couple of times until the image feels right for the post I am working on.
One thing I have noticed too is that the tool is quite forgiving.
If my first description I give misses the mark, being a little more specific usually fixes it. For example, describing a cosy coffee shop scene with a particular style gives a much better result than using a very general phrase.
Some small changes often make the difference.
Types Of Images You Can Create
There is a wide range of images you can create with the Wealthy Affiliate Image Studio. I use it most often for my blog images, but it works just as well for social posts, video visuals, and digital products.
- Blog featured images and headers – I use these at the top of posts to describe the topic properly instead of using a random stock photo. I usually see better engagement when the image actually fits the content.
- Images inside blog posts – These are useful for breaking up my longer articles or helping me explain a point visually. A simple graphic often makes a section a lot easier to read.
- Social media images – You can create square or vertical images for platforms like Facebook, Instagram, X, and LinkedIn that look more personal and less like stock photos.
- Pinterest images – Vertical images are good for this platform, especially when you want something that stands out while people are scrolling. I often add text after to suit the post title.
- YouTube thumbnails – Wide images are easy to create for video thumbnails, and having the correct format from the start saves time later on.
- Promotional images and banners – These are good for ads, in-site banners, or simple promotions without needing to use another design tool.
- Mockups for products – I use these to show ebooks, digital downloads, or simple product ideas in a relevant way.
- Images for digital products – This includes covers for guides, visuals for course sections, or graphics for email opt-ins.
For the kind of content I publish, it handles almost everything I need image wise all in one place.

You can also use Image Studio to create very different moods from the same basic idea.
Handling Aspect Ratios And Sizing
Getting the size right for your image makes a difference to how it looks once it’s published.
I’ve lost a lot of time in the past resizing images after the fact, only to find they still don’t quite fit. With the Image Studio, the format is chosen before the image is created, which avoids most of that going back and forth.
- Wide formats such as 16:9 or 21:9
These work well for blog headers, YouTube thumbnails, large page sections, and banners across a website. - Square formats such as 1:1
I mostly use these for social posts on platforms like Instagram or Facebook, and they also work well for profile or feature images. - Vertical formats such as 4:5, 2:3, or 9:16
These are good choices for Pinterest, Stories, Reels, and other mobile platforms where vertical images take up more screen space.
Because the format is set upfront, I do not need to crop or resize the image later just to make it fit. The images come out ready for me to use, with file sizes that are good for publishing without slowing a page down.
Editing And Refining Images Inside The Wealthy Affiliate Image Studio
One thing that’s worth being clear about is that the Image Studio is there for creating images, not editing them in the traditional sense. There are no manual tools for cropping, resizing, or adjusting colours after an image has been generated.
When using the Image Studio, the way you refine an image is by changing the prompt. If the first image isn’t quite right, you don’t edit it with sliders or buttons. Instead, you just describe what you want differently and generate a new version.
This is usually done by being more specific. Adding some extra details about the style, setting, mood, or angle often gets a closer result for what you need. You only need to ask for small changes to see a difference in the result.
If an image feels too wide, too busy, or not focused on the right part of the scene, you adjust the description rather than editing the image itself. The same applies if you want to change the background, have a different lighting style, or a slightly different layout.
This way of working can feel strange if you’re used to design software, but once you get used to it, it’s a good tool. Just know that you’re shaping the image before it exists, rather than fixing it afterwards.
For me, this keeps everything simple. I generate an image, decide whether it’s OK or not, and I create another version using a better description if I need to.
Resizing And Repurposing Visuals For Different Uses
When it comes to using the same idea on different platforms, Image Studio does this in a slightly different way than a traditional design tool.
You are not resizing or duplicating an existing image. Instead, you generate a new version of the image by changing the format and adjusting the prompt.
For example, if I create an image for a blog header and then later I need something for Pinterest or social media, I generate a new image using the same idea but choose a different aspect ratio. I may also change the description slightly so the layout works better for that platform.
This works really well once you get used to it. Rather than trying to have one image to fit everywhere, you can create a fresh version that already suits where it will be used. That usually gives better results than cropping or stretching an existing image.
Keeping the description similar will also help keep a consistent look. By using the same style, colours, or scene details in the prompt, the images still feel connected, even though you generate them separately.
If you publish content regularly or share posts across several platforms, this method makes it easier to create visuals that fit properly without any extra editing steps. You get more use out of the same idea, just presented in the right format each time.

Branding, Style, And Keeping A Consistent Look
Keeping a consistent look across images can be almost impossible when your visuals come from lots of different sources. With the WA Image Studio, consistency comes from how you write your prompts rather than from built in branding tools.
Here’s how I keep things visually consistent when using it.
- Using similar wording in prompts – I repeat the same style descriptions, colour tones, or mood in my prompts. This helps all of my images which I create feel related, even when they are generated separately.
- Keeping colours and lighting consistent through description – Instead of applying filters, I describe the colours and lighting which I want in the prompt. Using the same colour themes or lighting style helps images feel like they belong together.
- Sticking to familiar layouts and ideas – When I find a look that I like, I reuse the same type of description. This makes images feel connected across my posts, pages, or social content.
- Building consistency over time – There are art style options rather than full branding templates, but once you know which styles and wording work for you, it becomes easier to repeat the same look across new images.
This has helped me keep a more consistent visual style, especially when working on many different posts or updating parts of my website.
Everything just feels more joined up without needing any extra tools or manual editing.
Templates And Built-In Guidance
If you’re new to creating images, or you just want faster results, the guidance inside the Image Studio is helpful. I still get that blank moment sometimes where I know I need an image but I am not quite sure how to describe it.
The prompts and options inside the tool help get things moving.
Rather than working with fixed templates, Image Studio gives you choices like image size and art style, and this alone removes a lot of the guesswork which you normally face. Having those options in front of you makes it easier to decide what kind of image you want before you generate anything.
The prompt suggestions also help shape your description. You do not need to know design terms or think too deeply about wording. Simple descriptions about the subject, the mood, or setting are usually enough to get a good result.
This works even if you have no design background at all. You are not expected to know how images should be built. You just explain what you want in everyday language and adjust it slightly if the first result is not quite right for you.
I find this useful when I am working through several pieces of content at the same time. Having this guidance in place makes it easier for me to create multiple images without having to overthink each one.
It offers a starting point and lets you move forward instead of sitting there stuck.
How I Use Image Studio While Writing And Publishing
One of the things I like about the Image Studio is that it sits alongside the tools I already use when I’m writing and publishing my content.
When I’m working on a post, I don’t need to leave what I’m doing to go searching for images somewhere else. I can create them when I need them, keep writing, and come back to the image if it doesn’t quite work the first time.
Long gone are the days when I was running around looking for images. And honestly, I don’t miss that at all.
Because the images are created inside the platform, everything stays in one place, which makes it easier to keep track of what I’ve created and reuse any of my ideas when I need to.
I’ve found this helps me keep momentum too while I’m writing. I’m not stopping mid-post to deal with images or getting distracted by other tools. I can concentrate on finishing the content and handle my visuals as part of the same process.
This has made publishing feel a lot more enjoyable, especially when I’m working on several posts or updating my older content.
Many image tools I’ve seen only focus only on generation or on editing. What I like here is having everything in one place while I’m already working on my content.

Uses That Go Beyond Blogging
I mainly use the Image Studio for my blog content, but it is clear that it can be used in other ways too, depending on how someone runs their website or online work.
For anyone doing client related work, the Image Studio can be useful for creating simple visuals to support ideas or layouts. Even without doing full design work, being able to show a visual concept can help explain how something might look before moving further.
It’s also good for people creating digital products. Things like basic covers, supporting images, or simple visuals to sit alongside written content can be created without needing to look outside the platform. This keeps everything connected to the content itself rather than treating images as a separate task.
If you are active on social media, the Image Studio can also be used to create visuals that match your content instead of relying on stock images. Creating images around the same idea or topic makes it easier to keep things consistent across all of your posts.
For side projects or ideas you are testing, it can also help to create visuals quickly just to see how something might look. Even a rough image can be enough to decide whether an idea is worth developing further or not.
While blogging and on my social media channels is where I mostly use it, it is easy to see how the Image Studio could support other types of online work without needing extra tools or steps.
Additional Wealthy Affiliate Info & Resources
Speed And Trying Different Ideas
One of the strongest points of the Image Studio, in my opinion, is how quickly it produces the results. Most images are generated within a few seconds only, which makes it easy to test an idea without interrupting your flow.
If the first image is not quite right, I do not feel stuck with it. I can change the wording in the prompt slightly and generate another version almost straight away.
This speed is helpful because instead of spending ages trying to get one image perfect, I can try out a few variations and settle on the one that feels right for the page I’m working on.
It also takes away the delay that usually comes with looking for images elsewhere. There is no waiting, no changing tools, and no stopping what I am doing just to handle visuals. I can stay with my writing and treat image creation as part of the same process.
Overall, this has made creating visuals feel much more pleasant. Trying out different ideas doesn’t feel like extra work anymore. It feels like part of preparing the content properly before publishing it.
Copyright, Use Rights, And Legal Considerations
Whenever I use images on my website, I always want to be honest about where they come from and how they can be used. This has been important for me, especially after years of dealing with stock photos that come with restrictions, licences, or the good old small print that is easy to miss.
With the Wealthy Affiliate Image Studio, the images are all generated as original visuals. That means I can use them on my own website, in blog posts, and across all my social channels without worrying about running into the usual stock image limitations.
I am also not choosing from a library where the same image might appear on hundreds of other sites.
That said, I still think it is a good idea to keep an eye on the official terms inside Wealthy Affiliate, especially if you plan to use images for paid promotions or larger projects. Tools change, policies can be updated, and it only takes a moment to double check.
So far, I have not had or heard of any issues using the images created through the Image Studio.
Knowing where they come from though, and how they are generated gives me more confidence when publishing my content, and it removes a lot of the uncertainty I used to have when pulling images from outside sources.
How The Credits System Works

The WA Image Studio runs on the same AI credit system that Wealthy Affiliate uses across several of its tools. These credits are not limited to images only, and that is important to understand before using them.
Here’s how it works.
- As a Premium Plus member, I receive 60,000 AI credits per month as part of my membership.
- These credits are shared across different AI tools inside Wealthy Affiliate, including Image Studio, AI Authors for content creation, keyword research, niche ideas, and related features.
- Each image created in the Image Studio currently uses 500 credits.
- Using AI tools for your writing or research will also draw from the same monthly credit balance.
- Starter accounts receive a smaller number of credits, which is enough to test the tools and see how they work.
- Wealthy Affiliate occasionally runs challenges or promotions where you can win extra AI credits.
- There is also the option to purchase additional credits if needed, although I have never had to do this myself.
For the way I use Wealthy Affiliate, the credits included in my membership have always been more than enough. Even when creating images and using AI tools for writing or research, I have not felt restricted or forced to buy any more.
The system is clear and manageable. You can see your credit balance at any time, you know what actions use credits, and nothing suddenly stops you from working when you are in the middle of publishing content.
Limitations To Watch Out For
Even though I find the Image Studio very useful, like everything else, it is not perfect. There are a few things worth being aware of before you rely on it too much.
A Few Practical Limits To Be Aware Of
- Text inside images can vary – Earlier on, text inside AI generated images could be hit and miss. Mostly miss actually. These days though, it handles text much better and most of the time it comes out perfect and with no errors. That said, if you need very precise wording or exact placement, you may still need to regenerate the image once in a while with a slightly clearer prompt.
- Keeping the same character or look takes some care – Each image is created from a fresh prompt, so keeping the exact same character, face, or detailed style across many images can take a bit of experimenting and practice. Using similar wording helps sometimes, but it is not the same as copying and pasting an element in a design tool.
- Best suited for web use – The images are created with websites and social platforms in mind. For blogs, pages, and online content, they work extremely well. If you need very large print files, it is worth checking on the output before committing to anything physical.
- Prompt quality matters – The results depend heavily on how you describe what you want. Clear, simple prompts will give you the best results. There is a short learning curve here, but once you understand how some small wording changes can affect the output, it becomes very straightforward.
For most blogging and online content, these points are not something to frighten you away. I rarely run into situations where the Image Studio cannot give me what I need. It just helps to know where its limits are so you can work with it rather than against it.
Updates And What To Expect Going Forward
The Wealthy Affiliate Image Studio is updated regularly, and those updates happen quietly in the background. There is nothing for you to install, nothing to update manually, and nothing you need to manage on your end.
From what I have seen, a lot of these updates are done with member feedback in mind. When people ask for improvements, better results, or support for certain styles or different use cases, those requests influence how the tool develops over time. Kyle and Carson, who own Wealthy Affiliate, pay close attention to any feedback from members across all of the tools inside the platform.
I have also noticed that image quality has improved, and the way prompts are handled feels more reliable than it did earlier on. Small things like this matter when you are using the tool often, especially for regular publishing like I do.
What I like most is that these improvements do not interrupt how I work. The tool just gets better as time goes on, without me needing to change anything or relearn how it works.
It feels like a feature that is still being worked on and improved, rather than something that was released and forgotten about.
How The Image Studio Fits In With The Rest Of Wealthy Affiliate
The Image Studio is just one part of Wealthy Affiliate, but it sits very well alongside the other tools I already use.
When I am writing a post in WA SiteContent, creating images does not feel like a separate task like it used to anymore. It’s right there next to the writing process, and it doesn’t pull me away.
I no longer need to stop what I’m doing to search for images on other sites or move between different screens. I can create an image when I need it, see how it looks inside the post, and move on without upsetting the flow of what I’m working on.
Because everything is inside the same platform, it also cuts down on the usual mess. There are no folders full of oddly named image files and I don’t wonder where something was saved. If I want to reuse an idea or generate another version, it is easy to do without me starting all over again.
From my own experience, the fewer steps there are between writing and publishing, the more likely I am to get my content finished.
Image Studio has definitely helped me with that. I can spend more time writing and less time dealing with images as a separate problem, which has been one of the big benefits for me.

Frequently Asked Questions – FAQs
Yes, it is.
If you can describe what you want in plain language, you can use it. You do not need design experience or technical knowledge. I’ve found that even very simple descriptions produce good images, and if something isn’t quite right, changing a few words usually fixes it.
They can be made as simple or as detailed as you like.
Basic prompts work fine, but adding a bit more detail about style, mood, or setting usually gives you better results. You can have up to 2000 characters for your description prompt, and over time, you’ll get a feel for which wording works best, but there is no pressure to get it perfect first time.
Image Studio uses the same AI credits that are shared across all Wealthy Affiliate’s AI powered tools.
Each image currently uses 500 credits, and as a Premium Plus member, I receive more than enough credits each month to cover both image creation and all of the other AI tools as I need them.
I’ve never felt limited or needed to buy extra credits.
From my experience, yes.
The images are generated as original visuals, which means I can use them on my website and social channels without the usual stock image concerns.
I still recommend checking the official terms from time to time, especially if policies change. You might want to do some research if for example you want to include official company logos.
But I’ve had no issues so far.
Not in the traditional sense.
Image Studio is built for generating images rather than editing them. If an image isn’t quite right, the way to improve it is by adjusting the prompt and creating a new version.
Once you get used to that way of working, it becomes easy and it keeps things simple.
What I Like Most About The Wealthy Affiliate Image Studio
There are a few things I’ve come to appreciate while using the Wealthy Affiliate Image Studio.
- The speed is probably the biggest one. Images are created fast, which helps a lot when I’m working on a timeline or preparing my content in bulk.
- Writing prompts feels natural. I do not need to think like a designer or learn special wording. Simple descriptions work.
- I no longer need to use stock photo sites. Every image is created fresh, which means I am not seeing the same visuals used on dozens of other websites.
- Choosing the format before generating an image saves me a lot of time. It makes it easier to create visuals that already fit blog headers, social posts, or other layouts.
- Having all my images created inside Wealthy Affiliate keeps things organised. I no longer have folders full of random downloads that I forget about or can’t find later.
One thing I would mention, and this is not really a downside, is that the Image Studio can be a bit addictive. Because it’s fast and easy to generate images, it’s tempting just to keep creating variations to see what comes out.
That’s where it helps to stay aware of your AI credit usage. The same credits are used for image creation, content writing, keyword research, and other AI tools inside Wealthy Affiliate. If you are not paying attention, you can use credits faster than you expect.
I just keep an eye on my balance and think about what I actually need at that moment. If you use it this way, the Image Studio sits nicely alongside the other AI tools without causing any issues.
Overall, for how I work and the type of content I create, it has been a very positive addition.
Other Tools Worth Being Aware Of
There are of course many image tools around, and most people who create content online will already be familiar with names like Canva, Adobe Express, or even Photoshop.
Tools like Canva are very popular because they offer lots of design options and ready made layouts. They can be useful if you enjoy working with templates or want to spend more time arranging elements by hand.
They work fine, but you have to leave what you’re doing, use another tool, and then bring everything back into your site creation tools.
More advanced tools like Photoshop give you complete control, but they also come with a learning curve and extra cost. I personally never got my head around Photoshop and I spent more time frustrated than I did getting what I wanted. I know too that for many site owners, the level of control it offers is more than they actually need for their everyday content.
The reason I use the Wealthy Affiliate Image Studio is not because it replaces everything else, but because it suits how I work. It lets me create images while I’m writing, without interfering with my flow or turning image creation into a separate task.
If you already have other tools you’re comfortable with, there’s no pressure to change them. Image Studio just offers you another option, especially for those of you who want to keep image creation tied closely to their content and publishing process.
I use Canva too for some of my branding work, especially when I need to create consistent visuals like logos, brand colours, or simple layout elements that I reuse across my site.
A Quick Note From My Own Use
I use Wealthy Affiliate as part of my own online work and I regularly publish content using the tools inside the platform. The Image Studio is something I’ve used while writing my posts, creating featured images, and adding visuals to my website.
Everything shared in this review is based on my own experience using the Wealthy Affiliate Image Studio as part of my normal content creation process.
I have not based it on promotional material or second-hand information.
Below are a few example images I created using the Wealthy Affiliate Image Studio while testing it for this review and some of my other posts.


These are just a few examples I have. Just know that the results will vary depending on your prompt.
Final Thoughts On Wealthy Affiliate Image Studio
After spending time using the Wealthy Affiliate Image Studio, I see it as a very productive tool rather than just as something flashy for the sake of it.
It does one job well, which is helping you create original images without turning image creation into a separate task that slows everything else down.
For me, the biggest benefit is how closely it sits alongside my writing and publishing. I can create images when I need them, see how they look inside a post, and move on without breaking my rhythm. That on its own has saved me a lot of time compared to how I used to work with stock photos and external tools.
I don’t think it’s trying to replace advanced design software, and it doesn’t need to.
If you’re working on high-end print projects or very detailed branding work, you might still want other tools. But for blogging, social content, and everyday site visuals, the Image Studio covers what most people actually need.
If you already have a Wealthy Affiliate account, it’s well worth using the credits you’re given to try it properly and see how it works for you. And if you’ve been frustrated by stock images, subscriptions, or running between tools, this feature makes things feel a lot easier.
If You’re Not Yet A Wealthy Affiliate Member
If you’re not already a Wealthy Affiliate member, the Image Studio is included inside the platform and can be tested with a free account. That gives you the chance to explore the dashboard, see how the tools work together, and try out the features like the Image Studio without committing to anything.
I’ve also written a post explaining the Wealthy Affiliate Starter Membership benefits, which shows exactly what you can access on a free account before deciding whether it’s right for you.
There’s also my full Wealthy Affiliate review on this site where I go through the platform in detail, including the training, tools, and how everything goes together. If you’re curious about Wealthy Affiliate as a whole, that review will give you a better idea of what to expect and whether it suits the way you want to work online.
You can open a free Wealthy Affiliate account to try the Image Studio for yourself and see how it fits into your own content process before making any decisions.
Thanks for taking the time to read this Wealthy Affiliate Image Studio review. And if you’ve used Image Studio yourself, I’d also be interested to hear what you think.
If you have any questions or comments, please leave them below.
Chris
Quick Summary
The Wealthy Affiliate Image Studio is very useful if you want to create original images quickly while you’re writing and publishing your content inside Wealthy Affiliate. It’s good for bloggers, affiliate marketers, and anyone who wants to stay away from stock photos and extra image tools.
It may not be the best option if you need advanced design control, detailed image editing, or high quality print visuals.
My Overall Rating For The Wealthy Affiliate Image Studio Is 4.5 Out Of 5
Wealthy Affiliate
This is where my journey into the online world began, and it’s still the community I use for learning, tools, and support while working on my own projects.
About Chris Towers – Follow Me

My name is Chris Towers, and I run Affiliate Pro Solutions. I work with websites, content, and affiliate projects, and this website is where I share what I’ve learned from doing that work.
Most of what I write about comes from researching hosting companies, tools, and platforms that people use when building websites or trying to earn online. I look at how things are set up, what’s included, and where people often get caught out later.
I’m not connected to the companies I review beyond standard affiliate partnerships. This site does include affiliate links, but the aim here is to explain how the services work rather than push anyone into a decision.
You’ll find me on
Related
- The Wealthy Affiliate Image Studio Review From Hands On Use

- Wealthy Affiliate Leaderboards Explained – What You Need To Know
- The Wealthy Affiliate Starter Membership Benefits Explained
- How Much Money Can You Make With Wealthy Affiliate?

- How Does Wealthy Affiliate Pay You? Get Paid Easily and Securely!
- How Wealthy Affiliate Commissions Work and How You Can Earn


Just to be open with you, this page includes affiliate links. If you click on one of these links and make a purchase, I earn a small commission. There is no extra cost to you at all. This simply helps support the content I share here. Thank you for your support, it really is appreciated.
I really enjoyed this review. It’s always nice to see one that actually shows how the Image Studio is used day to day, not just a sales pitch.
The parts about ditching stock photo sites and choosing the right image sizes were very helpful.
A question though. If someone wanted to keep a similar look across their blog, like colours or style, can that be done just through the prompts?
Thanks and I appreciate that.
Yes, you can keep a similar look across all of your images, but it comes from how you write the prompts rather than from any fixed branding settings. I just repeat the same wording around colours, lighting, mood, or style, and that helps the images come across as connected.
It’s not like saving a template and reusing it over and over, but once you know what wording works, it’s easy to keep things more consistent.
I’ve found that using the same style descriptions gives a pretty uniform look across my posts. It takes a little experimenting at first, some trial and error, but after that it becomes simple enough.
Hope this answers your question.
Chris
Wow, Chris
The Wealthy Affiliate Image Studio sounds like a designers dream. So many people could benefit from this new image studio at Wealthy Affiliate.
This tool sure seems to solve many of the problems designing images that other similar tools don’t solve. I am impressed with the variety of images this studio can be used for.
The Wealthy Affiliate Image Studio sounds to be a great tool, and with it being AI it can create beautiful and unique images I am sure.
If I joined Wealthy Affiliate as a free starter member would I have access to this tool?
Jeff
Thanks a lot Jeff. I appreciate your message.
Yes it does remove a lot of the usual frustration around images and keeps everything in one place while you’re already working on your content.
To answer your question, yes, you can access the Image Studio as a free starter member. You won’t get the same number of AI credits as the paid membership, but you do get enough to test the tool out properly and see how it works.
You can see what you get inside the starter membership here.
If you do give it a go, I’d be interested to hear what you think of it from your own experience.
Thanks
Chris